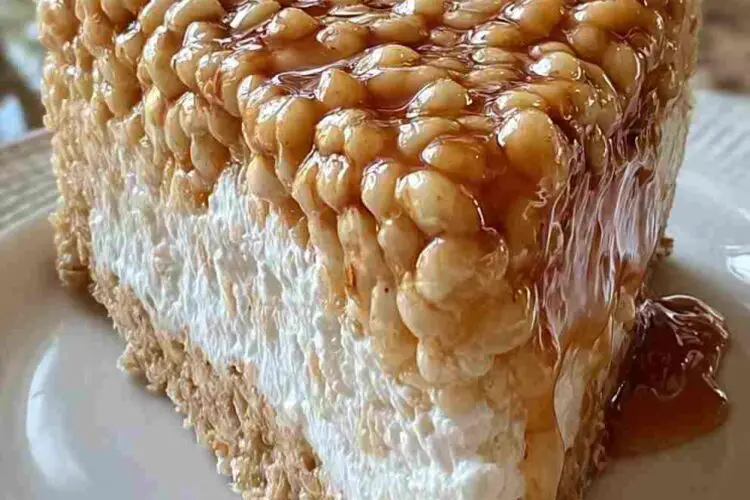
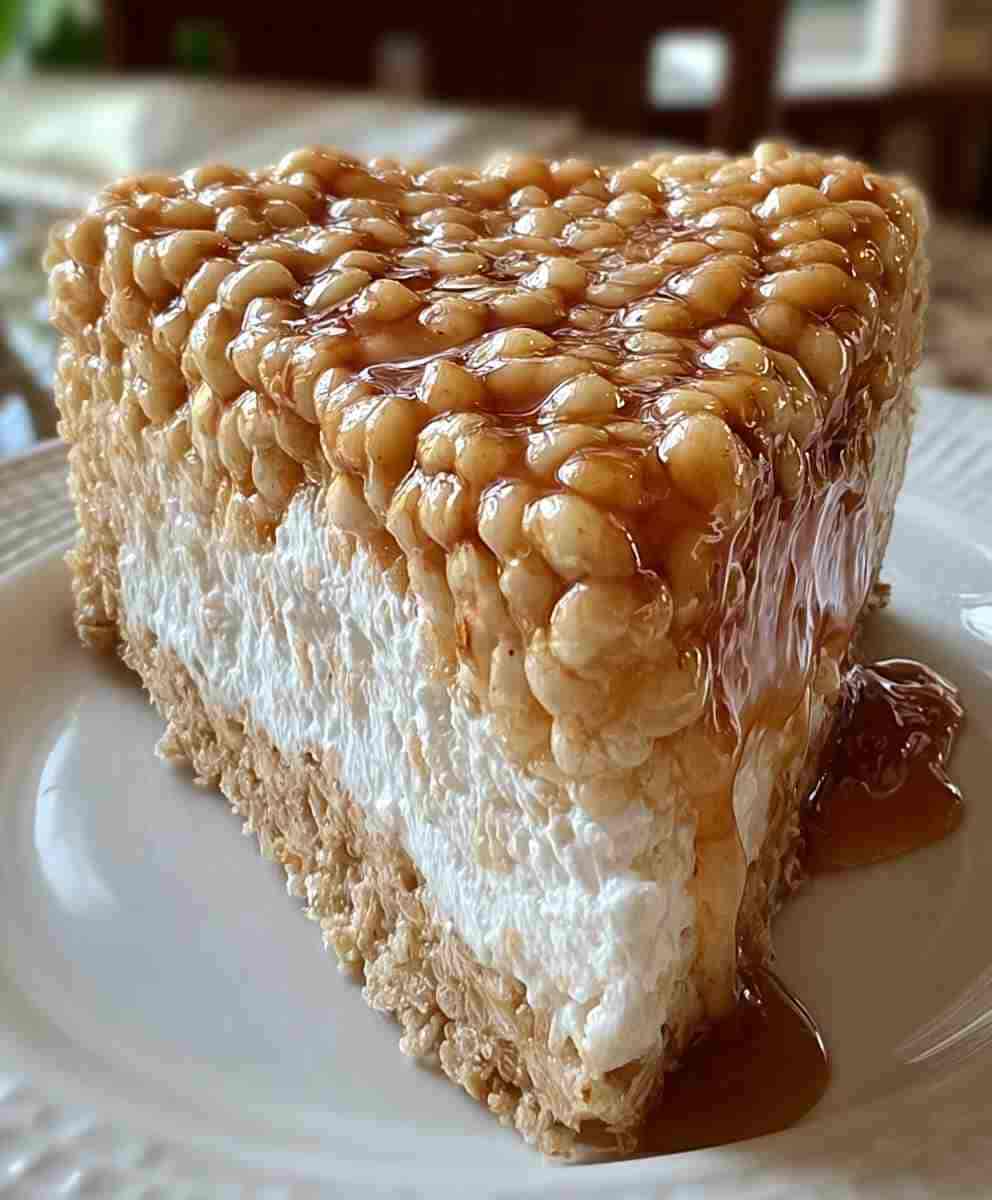
Imagine biting into a crunchy, buttery cereal crust layered with soft, marshmallow-infused cheesecake, topped with playful Rice Krispie clusters and drizzles of chocolate. This Rice Krispie Treat Cheesecake is more than just dessert — it’s a nostalgic, indulgent experience in every bite.
Perfect for family-friendly celebrations or a fun weekend treat, this recipe combines classic comfort food elements with a modern cheesecake twist. It’s one of the easiest no-bake desserts you can make, requiring minimal prep, no oven, and delivering maximum flavor and texture. With cheesy comfort food vibes and playful marshmallow sweetness, it’s sure to be a hit with both children and adults.
Why You’ll Love This Recipe
- No-Bake Convenience: Perfect for when you want a show-stopping dessert without using the oven.
- Fun Texture: Crunchy Rice Krispie crust and clusters paired with smooth, airy cheesecake filling.
- Kid-Friendly: Combines familiar flavors and playful presentation that kids adore.
- Make-Ahead Friendly: Chill overnight for stress-free party prep.
- Customizable: Add chocolate drizzle, mini marshmallows, or candy toppings to suit any occasion.
- Nostalgic Comfort: The familiar Rice Krispies and marshmallow flavors evoke happy memories, making it perfect for family gatherings.
This dessert is the ultimate easy family dessert recipe, perfect for entertaining or casual weeknight indulgence.
Ingredient Breakdown
For the Crust:
- Unsalted Butter (½ cup / 1 stick): Binds the Rice Krispies and marshmallows together, creating a firm yet soft crust.
- Mini Marshmallows (10 oz bag): Melted to create a sticky, sweet base that holds the cereal in place.
- Rice Krispies Cereal (8 cups): Provides the classic crunchy texture that contrasts beautifully with the creamy filling.
For the Filling:
- Heavy Cream (1 cup, chilled): Whipped to stiff peaks for a light, airy texture that gives the cheesecake its mousse-like consistency.
- Cream Cheese (16 oz, softened): Creates a rich, creamy base that complements the marshmallow and adds cheesecake flavor.
- Confectioners’ Sugar (½ cup): Sweetens the cheesecake filling smoothly, without graininess.
- Marshmallow Fluff (¾ cup): Adds extra sweetness and a nostalgic marshmallow flavor, keeping the filling silky.
- Vanilla Extract (1 tsp): Enhances flavor depth and aroma, tying all ingredients together.
Optional Garnishes:
- Whipped Cream or Cool Whip: Adds extra creaminess and decorative appeal.
- Drizzled White or Milk Chocolate: For elegance and a touch of chocolate indulgence.
- Mini Marshmallows or Rice Krispies Clusters: Fun, playful toppings to enhance crunch and presentation.
Each ingredient plays a key role in creating a dessert that’s creamy, crunchy, sweet, and perfectly balanced.

Pro Tips for Perfect Cheesecake
- Use Cold Equipment: Chill your mixing bowl before whipping cream to ensure stiff peaks.
- Do Not Overmix: Fold whipped cream gently into the cream cheese mixture to maintain lightness.
- Reserve Some Crust for Topping: Setting aside a portion of the Rice Krispies crust adds playful decoration.
- Use Full-Fat Cream Cheese: This gives the richest flavor and best stability for the filling.
- Press Crust Lightly: Avoid pressing too hard to keep the Rice Krispies light and airy rather than rock-solid.
These tips ensure the cheesecake has the perfect texture, light filling, and crunchy elements that delight every bite.
Ingredient Swaps & Variations
- Chocolate Lover’s Version: Add mini chocolate chips to the filling or drizzle melted chocolate on top.
- Gluten-Free: Rice Krispies are naturally gluten-free in most countries; confirm packaging.
- Nutty Twist: Sprinkle chopped peanuts or almond slivers for added texture and flavor.
- Dairy-Free: Substitute cream cheese and heavy cream with coconut cream and dairy-free cream cheese.
- Extra Sweet Fun: Use colorful mini marshmallows for festive occasions like birthdays or holidays.
These variations let you adapt the recipe for dietary needs, personal taste, or special events, making it a versatile crowd-pleaser.
Serving Suggestions
- Chilled Dessert: Best served cold; slice with a sharp knife for clean portions.
- Party-Friendly: Serve in small squares or individual jars for gatherings.
- Complementary Sides: Pair with fresh berries or fruit coulis to balance sweetness.
- Dessert Buffet: Use as a centerpiece dessert for potlucks or birthday parties.
- Festive Toppings: Drizzle chocolate, sprinkle mini marshmallows, or decorate with Rice Krispies clusters for visual appeal.
Presentation matters, and these tips help make your cheesecake look as good as it tastes.
Make-Ahead & Storage Tips
- Refrigeration: Chill for at least 4 hours, ideally overnight, to set the filling completely.
- Storage: Keep refrigerated in an airtight container for up to 3–4 days.
- Freezing: Can be frozen for up to 1 month; thaw in the refrigerator before serving.
- Transport: Chill the cheesecake thoroughly before transporting to parties or events to maintain structure.
This dessert is ideal for make-ahead preparation, stress-free entertaining, and serving a crowd without last-minute rush.
Cultural or Historical Notes
Rice Krispies treats have been a nostalgic American dessert since their invention in the 1930s. Combining this childhood favorite with cheesecake transforms it into a modern twist that retains the playful crunch while adding creamy richness. This hybrid dessert appeals to both children and adults, bringing a touch of nostalgia to modern celebrations.
Frequently Asked Questions
1. Can I make this cheesecake ahead of time?
Yes, it actually benefits from chilling overnight to firm up the filling and meld the flavors.
2. Can I use regular marshmallows instead of mini?
Mini marshmallows work best for melting evenly, but regular marshmallows can be chopped and used.
3. How do I prevent the crust from getting too hard?
Press lightly when forming the crust; avoid over-compressing to keep the crunchy, airy texture.
4. Can I use low-fat cream cheese?
Yes, but the filling may be slightly less rich and creamy.
5. How do I get clean slices?
Use a sharp knife, wipe between cuts, and ensure the cheesecake is fully chilled.
Rice Krispie Treat Cheesecake
Ingredients
Equipment
Method
- Melt butter over medium heat, then add marshmallows and stir until smooth. Remove from heat and stir in Rice Krispies cereal. Reserve 3 cups of mixture for topping. Press the remaining mixture into a springform pan and chill in the refrigerator.
- Whip chilled heavy cream until stiff peaks form; set aside. Beat cream cheese and confectioners’ sugar until smooth. Add Marshmallow Fluff and vanilla extract, mixing until silky. Gently fold whipped cream into the mixture.
- Pour filling into the chilled crust and smooth the top. Use the reserved Rice Krispies mixture to form clusters and decorate the top.
- Refrigerate for at least 4 hours or overnight. Release cheesecake from springform pan and slice carefully. Garnish with chocolate drizzle, whipped cream, or extra mini marshmallows if desired.
Notes
- Reserve part of the Rice Krispies crust for decorative clusters.
- Fold whipped cream gently to maintain airiness.
- Chill fully before slicing for clean, neat pieces.
- Customize toppings to fit festive or seasonal themes.