Advertisements

Peanut Butter Lunch Lady Bars

by easysweetmeal
Peanut Butter Lunch Lady Bars

WANT TO SAVE THIS RECIPE?

Looking for a nostalgic treat that’s quick to make and packed with rich peanut butter flavor? These Peanut Butter Lunch Lady Bars deliver chewy, dense bars topped with creamy peanut butter frosting — perfect for school lunches, after-school snacks, or anytime you crave a classic peanut butter dessert

Advertisements

Why You’ll Love This Recipe

  • Classic peanut butter flavor everyone loves

  • Simple ingredients you probably already have on hand

  • Soft, chewy bars with a creamy, decadent frosting

  • Easy to make in one pan, no fancy equipment required

  • Perfect for bake sales, school snacks, or casual dessert

Ingredients Breakdown

Bar Base:

  • 2 cups all-purpose flour: Provides structure to the bars.

  • 2 cups granulated sugar: Adds sweetness.

  • 1 teaspoon baking soda: Helps the bars rise slightly.

  • 1 teaspoon salt: Balances the sweetness.

  • ½ cup whole milk: Moistens the batter.

  • 1 teaspoon vanilla extract: Adds flavor depth.

  • 2 large eggs, beaten: Bind ingredients and add richness.

  • 1 cup (2 sticks) unsalted butter: Adds moisture and buttery flavor.

  • 1 cup creamy peanut butter: Gives the bars their signature peanut butter taste and texture.

Frosting:

  • ½ cup (1 stick) unsalted butter: Creates a creamy base for the frosting.

  • ½ cup creamy peanut butter: Intensifies the peanut butter flavor.

  • 2 tablespoons milk: Thins the frosting for spreading.

  • 4 cups powdered sugar: Sweetens and thickens the frosting.
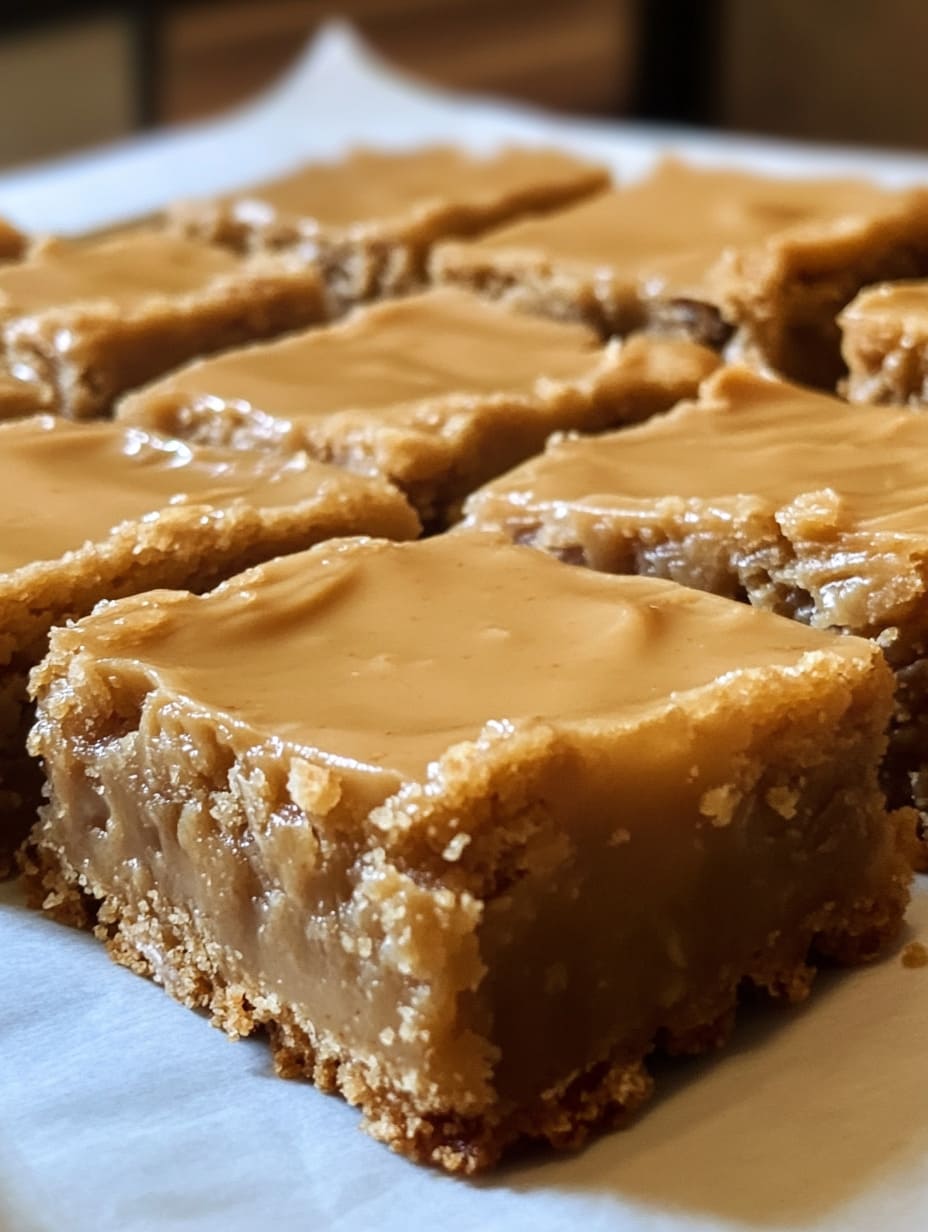
Peanut Butter Lunch Lady Bars

Tips and Tricks

  • For even bars, spread batter carefully and smooth the top before baking.

  • Allow bars to cool completely before frosting to avoid melting the frosting.

  • Use creamy peanut butter for smooth texture; chunky peanut butter will change the consistency.

  • Store bars in an airtight container to maintain freshness.

Variations and Customizations

  • Add mini chocolate chips to the batter for a peanut butter-chocolate twist.

  • Sprinkle chopped peanuts on the frosting before it sets for extra crunch.

  • Substitute half the sugar with brown sugar for a deeper caramel flavor.

  • For a healthier version, use natural peanut butter and reduce sugar slightly.

Pairing Suggestions

  • Serve with a cold glass of milk or your favorite coffee for the perfect snack.

  • Pair with fresh fruit like apple slices or bananas for a balanced treat.

  • Great accompaniment to vanilla or chocolate ice cream for dessert.

Storage Instructions

  • Store bars in an airtight container at room temperature for up to 3 days.

  • Refrigerate for longer freshness up to 1 week; bring to room temperature before serving.

  • Bars can be frozen for up to 2 months. Thaw overnight in the fridge.

Popular Questions

Can I use peanut butter powder instead of creamy peanut butter?

Powdered peanut butter is much drier and won’t provide the same richness; it’s best to stick with creamy peanut butter for this recipe.

Advertisements

Can I use salted butter instead of unsalted?

Yes, but reduce or omit the added salt in the dry ingredients to avoid an overly salty taste.

How do I know when the bars are done?

The bars are ready when a toothpick inserted into the center comes out clean or with a few moist crumbs.

Can I make these bars gluten-free?

You can substitute all-purpose flour with a gluten-free flour blend, but texture may vary slightly.

Advertisements

Print
clock clock iconcutlery cutlery iconflag flag iconfolder folder iconinstagram instagram iconpinterest pinterest iconfacebook facebook iconprint print iconsquares squares iconheart heart iconheart solid heart solid icon
Peanut Butter Lunch Lady Bars

Peanut Butter Lunch Lady Bars


  • Author: easysweetmeal
  • Total Time: 35 minutes
  • Yield: 24 bars 1x

Description

These classic, rich bars combine a moist, peanut buttery base with a creamy peanut butter frosting—perfect for peanut butter lovers craving a nostalgic, sweet treat that’s easy to make and share.


Ingredients

Scale
  • 2 cups all-purpose flour

  • 2 cups granulated sugar

  • 1 teaspoon baking soda

  • 1 teaspoon salt

  • ½ cup whole milk

  • 1 teaspoon vanilla extract

  • 2 large eggs, beaten

  • 1 cup (2 sticks) unsalted butter

  • 1 cup creamy peanut butter

  • ½ cup (1 stick) unsalted butter

  • ½ cup creamy peanut butter

  • 2 tablespoons milk

  • 4 cups powdered sugar


Instructions

Step 1: Prepare Oven and Pan

Preheat your oven to 400°F (205°C). Grease a large sheet pan (approximately 13×18 inches) or line it with parchment paper for easy removal.

Advertisements

Step 2: Mix Dry Ingredients

In a large bowl, whisk together flour, granulated sugar, baking soda, and salt. Set aside.

Step 3: Mix Wet Ingredients

In a separate bowl, combine the milk, vanilla extract, and beaten eggs. Whisk lightly to blend.

Step 4: Melt Butter and Peanut Butter

In a medium saucepan over medium heat, melt the unsalted butter and creamy peanut butter together. Once the mixture reaches a gentle boil, immediately remove from heat.

Step 5: Combine Ingredients

Slowly stir the dry ingredients into the melted peanut butter mixture until combined. Then add the milk and egg mixture and stir until smooth and well incorporated.

Step 6: Bake the Bars

Pour and spread the batter evenly into your prepared pan. Bake for 20 minutes or until a toothpick inserted in the center comes out clean. Remove from the oven and allow the bars to cool completely in the pan.

Step 7: Make the Frosting

In a small saucepan, melt butter and peanut butter together over medium heat. Bring just to a boil, then remove from heat. Stir in milk, then gradually add powdered sugar, stirring continuously until the frosting is smooth and spreadable.

Step 8: Frost the Bars

Pour the warm frosting evenly over the cooled bars. Use a spatula to spread it smoothly. Let the frosting set at room temperature before slicing into squares.

Notes

  • These bars are a beloved retro dessert with a rich peanut butter flavor that kids and adults alike adore.

  • Perfect for bake sales, lunchboxes, or a sweet treat after dinner.

  • Easy to scale up for parties or gatherings by doubling the recipe.

  • Prep Time: 15 minutes
  • Cook Time: 20 minutes
  • Category: Dessert
  • Method: Baking
  • Cuisine: American

WANT TO SAVE THIS RECIPE?

Advertisements

You may also like

Leave a Comment

Recipe rating