
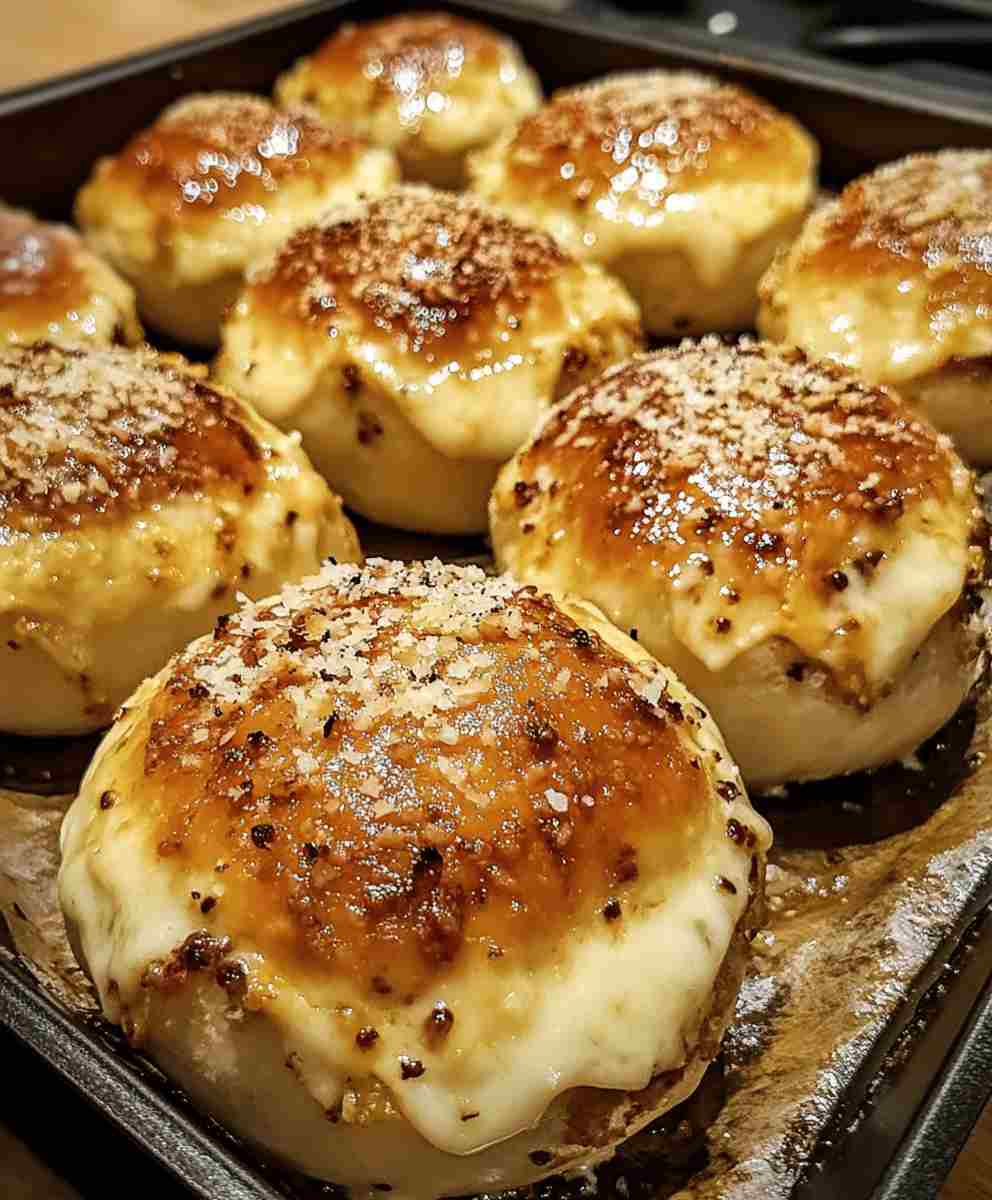
If you love cheesy comfort food and crave easy dinner ideas that impress, Garlic Parmesan Cheeseburger Bombs are your ultimate solution. Picture soft slider buns filled with juicy, seasoned ground beef, gooey melted cheese, and topped with rich garlic Parmesan butter. Every bite delivers a perfect combination of savory, buttery, and cheesy goodness that your family will devour in minutes.
These little bites aren’t just tasty—they’re incredibly versatile. Serve them as a quick weeknight recipe, a party-ready appetizer, or a budget-friendly meal that feels indulgent without breaking the bank. Unlike traditional burgers, these baked bombs eliminate the mess of the skillet or grill, offering hands-off convenience without sacrificing flavor. Whether you’re preparing a simple family dinner or hosting friends, these bombs are guaranteed to be a hit.
With minimal prep and maximum flavor, this recipe is ideal for anyone seeking affordable meals, simple family recipes, or a satisfying family comfort food option that everyone can enjoy.
Why You’ll Love This Recipe
- Quick and easy prep: Ready in under 30 minutes from start to finish, perfect for easy dinner for beginners.
- Family-approved: Kids and adults alike love the cheesy, beefy filling.
- Budget-friendly ingredients: Uses pantry staples for an affordable, budget-friendly recipe without compromising taste.
- Versatile for any occasion: Ideal for meal prep recipes, casual dinners, or easy party food ideas.
- Cheesy and satisfying: Gooey cheese and flavorful beef make this a true cheesy comfort food experience.
- Customizable: Swap cheeses, sauces, or buns to suit your family’s preferences, perfect for healthy recipes for families.
Ingredient Breakdown
Understanding each ingredient helps you see why this recipe delivers such rich, flavorful results. Here’s a closer look:
For the Cheeseburger Filling
- Ground beef (1 lb): Provides juicy, savory flavor and a hearty texture. Use 80/20 for the juiciest results or lean for a healthier weeknight dinner.
- Onion (½ cup, finely chopped): Adds sweetness and depth to balance the rich beef and cheese.
- Worcestershire sauce (1 tbsp): Enhances umami, giving that classic cheeseburger taste.
- Ketchup (1 tbsp): Adds tangy sweetness and helps bind the filling.
- Mustard (1 tbsp): Introduces mild acidity and flavor complexity.
- Salt & pepper: Simple seasonings to elevate the dish.
- Shredded cheese (1 cup, cheddar or mozzarella): Melts into the filling for gooey, comforting texture. Choose freshly shredded for best cheese for cooking results.
For the Garlic Parmesan Butter
- Butter (¼ cup, melted): Creates a golden, flavorful crust on the buns.
- Parmesan cheese (2 tbsp, grated): Adds nutty, salty depth for garlic butter recipes.
- Garlic (2 cloves, minced): Aromatic backbone of the topping, infusing every bite with savory flavor.
- Parsley (1 tbsp, chopped): Brightens the rich dish and adds color.
- Olive oil (1 tbsp): Helps spread the butter evenly and prevents over-browning.
- Salt (¼ tsp): Enhances and balances all the flavors.
For the Bombs
- Slider buns or dinner rolls (12): Soft, sturdy buns hold the filling perfectly while baking. Choose high-quality rolls for the best texture and flavor.

Pro Tips for Perfect Cheeseburger Bombs
- Soft yet sturdy rolls: Ensure your buns won’t fall apart while baking.
- Drain beef fat: Prevents soggy buns.
- Cool filling before assembling: Keeps cheese from melting prematurely.
- Optional broil: 1–2 minutes under broiler for extra golden tops.
- Meal prep hack: Make filling ahead of time for easy weeknight dinners or family meal prep.
Ingredient Swaps or Variations
- Low-carb option: Use low-carb buns or tortillas for keto-friendly swaps.
- Vegetarian alternative: Replace beef with sautéed mushrooms, lentils, or plant-based meat.
- Spicy variation: Add jalapeños or pepper jack cheese.
- Breakfast twist: Use scrambled eggs and for morning cheesy comfort food.
- Gluten-free version: Substitute gluten-free rolls for gluten-free recipes.
Serving Suggestions
- Pair with fries, tots, or potato wedges for classic comfort food.
- Serve with a fresh green salad for healthy meal pairings.
- Arrange as a platter with multiple dipping sauces for easy party food ideas.
- Pair with creamy tomato soup for cozy winter dinners.
- Wrap leftovers for lunch boxes or snacks.
Make Ahead + Storage Tips
- Prep ahead: Make the beef filling a day in advance.
- Refrigerate leftovers: Store baked bombs in airtight containers for up to 4 days.
- Reheat: Oven at 350°F for 10 minutes or air fryer 3–4 minutes.
- Freeze: Freeze unbaked bombs for up to 2 months. Bake directly from frozen with a few extra minutes.
- Leftover hacks: Slice leftover bombs for game day appetizers or lunch meal prep.
Cultural or Historical Notes
Cheeseburgers are a staple of American comfort food, and these bite-sized baked bombs bring that nostalgic flavor to the table in a modern, family-friendly format. Inspired by party appetizers and weeknight dinners, this recipe combines the convenience of baked sliders with the familiar taste of cheeseburgers — a traditional family meal reinvented for today’s kitchens.
Frequently Asked Questions (FAQ)
1. Can I make this recipe ahead of time?
Yes. Assemble and refrigerate up to 24 hours in advance, then brush with garlic butter before baking.
2. Can I make it healthier?
Use lean ground beef, reduced-fat cheese, and whole wheat or low-carb buns for a lighter weeknight dinner.
3. What’s the best way to store leftovers?
Airtight containers in the fridge for up to 4 days. Reheat in the oven or air fryer.
4. Can I freeze them?
Yes. Freeze unbaked bombs up to 2 months. Bake from frozen, adding a few extra minutes.
5. What dipping sauces work best?
Ketchup, mustard, ranch, or spicy mayo are all crowd-pleasers.
Garlic Parmesan Cheeseburger Bombs
Ingredients
Equipment
Method
- In a skillet, cook the ground beef over medium heat until browned. Drain excess fat.
- Add the chopped onion, Worcestershire sauce, ketchup, mustard, salt, and pepper. Stir and cook for another 2 minutes. Set aside to cool.
- In a small bowl, mix together the melted butter, Parmesan cheese, minced garlic, chopped parsley, olive oil, and salt. Stir well and set aside.
- Slice the slider buns or dinner rolls in half, keeping them attached. Place a spoonful of the cooled cheeseburger filling onto the bottom half of each bun. Sprinkle the shredded cheese on top of the filling. Place the top half of the bun on top and gently press down.
- Preheat the oven to 375°F (190°C). Place the assembled buns in a baking dish and brush the garlic Parmesan butter over the top of each bun.
- Bake for 15–20 minutes, or until the buns are golden brown and the cheese has melted.
- Garnish with additional parsley and serve warm with dipping sauces like ketchup or mustard.


