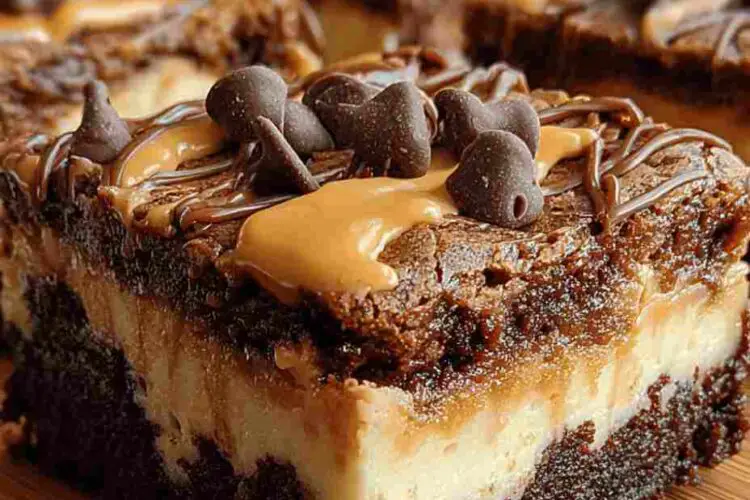
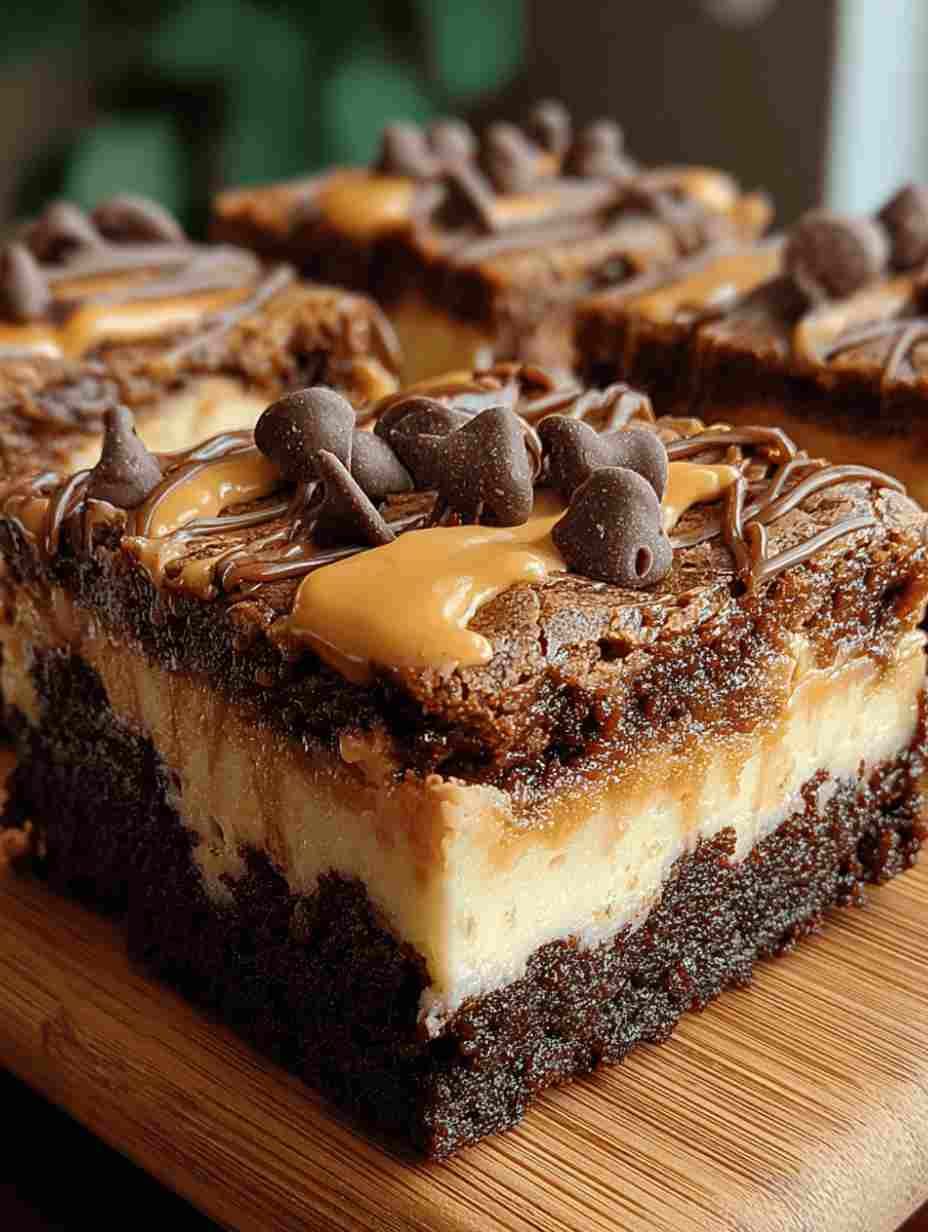
If you’re searching for the perfect fusion of chocolate decadence and creamy peanut butter bliss, these Peanut Butter Paradise Cheesecake Brownies will absolutely steal your heart. Imagine sinking your fork into a fudgy brownie base, topped with a silky peanut butter cheesecake swirl that melts in your mouth with every bite. These bars deliver the best of both worlds—rich chocolate indulgence and creamy cheesecake perfection—all baked into one stunning dessert.
This is the kind of recipe that transforms a simple sweet craving into a full-on dessert experience. Whether you’re baking for a family gathering, potluck, or just a cozy weekend treat, these brownies are bound to impress. The flavor combination alone makes them an instant classic for fans of cheesy comfort food desserts, affordable baking ideas, and quick homemade sweets.
Why You’ll Love This Recipe
- Easy yet impressive: No complicated techniques—just simple, step-by-step mixing.
- Rich and indulgent: The perfect balance of fudgy chocolate and creamy peanut butter cheesecake.
- Crowd favorite: Ideal for family gatherings, holiday desserts, or bake sale recipes.
- Budget-friendly ingredients: Uses pantry staples and common grocery store items.
- Versatile: You can customize with toppings like peanut butter cups, chopped nuts, or chocolate drizzle.
- Make-ahead dessert: Perfect for meal prep recipes or baking in advance for parties.
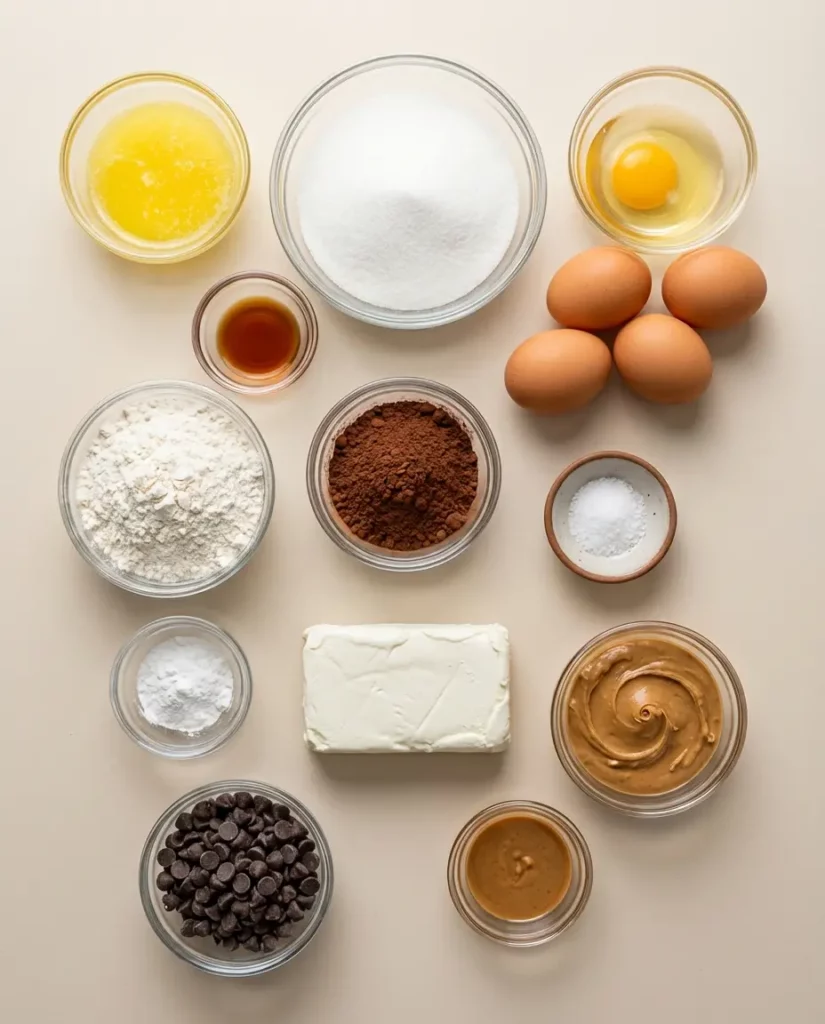
Ingredient Breakdown:
For the Brownie Layer
- Unsalted Butter (1 cup): Provides richness and moisture, giving the brownies their classic fudgy texture. Melted butter binds everything together and enhances the chocolate flavor.
- Granulated Sugar (2 cups): Sweetens and helps achieve that shiny, crackly brownie top everyone loves.
- Eggs (4 large): Essential for structure and moisture. They also help emulsify the butter and cocoa mixture.
- Vanilla Extract (1 tsp): Adds depth and warmth to both the brownie and cheesecake layers.
- All-Purpose Flour (1 cup): The base dry ingredient that gives the brownies structure without making them cakey.
- Unsweetened Cocoa Powder (1 cup): The star of the brownie base, creating a rich, intense chocolate flavor.
- Salt (½ tsp): Balances sweetness and enhances flavor.
- Baking Powder (½ tsp): Provides a subtle lift, keeping the brownies soft and tender rather than dense.
For the Peanut Butter Cheesecake Layer
- Cream Cheese (8 oz): Smooth, tangy, and creamy—creates the cheesecake texture that complements the rich brownie.
- Creamy Peanut Butter (½ cup): Adds nutty flavor and luxurious creaminess; use a brand that isn’t too oily for best results.
- Granulated Sugar (½ cup): Sweetens the cheesecake layer without overpowering the peanut butter flavor.
- Egg (1 large): Helps bind the filling and keeps it creamy during baking.
- Vanilla Extract (1 tsp): Brings a hint of warmth and sweetness to balance the nutty richness.
- Salt (Pinch): Enhances the overall flavor profile and cuts through the sweetness.
Optional Toppings
- Chocolate Chips (½ cup): Melt slightly on top for extra richness and a bakery-style finish.
- Melted Peanut Butter (2 tbsp): Drizzled over cooled brownies for a stunning, picture-perfect presentation.
Pro Tips
- Use room-temperature ingredients: This ensures your cheesecake layer blends smoothly without lumps.
- Do not overmix the batter: Overmixing can introduce air, leading to cracks in your cheesecake layer.
- Line your pan with parchment paper: It makes removing and slicing the brownies much easier.
- Swirl carefully: Use a knife or skewer to gently swirl the cheesecake layer for that signature marbled effect.
- Let them cool completely: This helps the cheesecake layer firm up and makes for cleaner slices.
These easy baking tips guarantee bakery-quality brownies every time, even if you’re new to homemade desserts.
Ingredient Swaps and Variations
- Gluten-Free Option: Replace all-purpose flour with a 1:1 gluten-free baking blend for gluten-free dessert recipes.
- Low-Carb Version: Substitute sugar with monk fruit or erythritol to create keto-friendly brownies.
- Nut-Free Alternative: Swap peanut butter for sunflower seed butter for an allergy-friendly dessert.
- Extra Chocolatey: Fold in ½ cup of chocolate chunks or drizzle ganache over the top for a double-chocolate effect.
- Crunchy Texture: Add crushed pretzels, chopped peanuts, or Reese’s Pieces for a sweet-salty crunch.
These variations make it easy to personalize this dessert to your dietary needs or preferences—keeping it fun, flavorful, and flexible.
Serving Suggestions:
- Serve warm: Pair with a scoop of vanilla ice cream for a classic dessert duo.
- Chilled treat: Enjoy straight from the fridge for a denser, cheesecake-like texture.
- Dessert platter: Slice into bite-sized squares for parties or gatherings.
- Holiday favorite: Perfect addition to Christmas cookie trays or Thanksgiving dessert spreads.
- Coffee companion: These brownies are incredible with a latte or cappuccino for a cozy afternoon indulgence.
No matter how you serve them, these brownies make every bite feel like pure dessert paradise—rich, creamy, and unforgettable.
Make Ahead and Storage Tips
These brownies are a baker’s dream because they store beautifully and taste even better the next day.
- Refrigerate: Once cooled, store in an airtight container in the refrigerator for up to 5 days.
- Freeze: Wrap individual bars in plastic wrap, then place them in a freezer bag. They’ll keep for up to 3 months. Thaw in the fridge overnight before serving.
- Make Ahead: Prepare the batter up to 24 hours in advance, refrigerate, and bake fresh when ready.
- Reheat: Warm individual brownies in the microwave for 10–15 seconds for a soft, just-baked feel.
These meal prep dessert ideas are perfect for busy families who love having a homemade treat ready whenever the craving hits.
Cultural or Historical Notes: A Dessert Inspired by American Classics
The combination of chocolate brownies and peanut butter cheesecake pays homage to two beloved American desserts—classic brownies and New York-style cheesecake. Both desserts became staples of American baking in the early 20th century, and when fused together, they create the ultimate comfort food indulgence. Today, this hybrid treat is a favorite at bake sales, potlucks, and family celebrations, loved for its bold flavors and nostalgic appeal.
Frequently Asked Questions (FAQ)
Can I make these brownies ahead of time?
Absolutely! In fact, these brownies taste even better after a night in the fridge as the flavors meld together.
How can I make this recipe healthier?
Swap regular sugar for coconut sugar, and use light cream cheese and natural peanut butter to reduce calories without sacrificing flavor.
Can I double this recipe for a crowd?
Yes! Just bake in two 9×13-inch pans or a larger sheet pan. Adjust baking time slightly if doubling.
What’s the best way to cut clean brownie squares?
Chill the brownies completely, then use a sharp knife wiped clean between each cut for perfect slices.
Can I make these brownies without peanut butter?
You can substitute Nutella, almond butter, or cookie butter for a fun flavor twist.
Peanut Butter Paradise Cheesecake Brownies
Ingredients
Equipment
Method
- Preheat your oven to 350°F (175°C). Grease a 9×13 inch baking pan and line it with parchment paper, leaving some overhang for easy removal.
- In a large bowl, combine the melted butter and granulated sugar. Whisk until well combined. Add in eggs, one at a time, whisking thoroughly after each addition. Stir in the vanilla extract.
- In a separate bowl, whisk together flour, cocoa powder, salt, and baking powder. Gradually add to the wet mixture, folding gently until just combined. Do not overmix.
- Pour the brownie batter into the prepared pan and spread evenly.
- In another bowl, beat cream cheese and sugar until smooth. Add peanut butter, then mix in egg, vanilla, and a pinch of salt until creamy.
- Spoon the peanut butter cheesecake mixture over the brownie layer. Swirl with a knife or skewer to create a marbled effect.
- Bake for 30–35 minutes, or until edges are set and a toothpick inserted in the center comes out with a few moist crumbs.
- If using chocolate chips, sprinkle over hot brownies after baking. Cool for a few minutes, then drizzle melted peanut butter on top.
- Cool brownies in the pan for at least 30 minutes before lifting out with parchment. Cut into squares and serve.

