Cherry Bars Recipe: A Sweet Delight for Every Occasion
Welcome to my kitchen, fellow food enthusiasts! Today, I’m excited to share with you a delightful recipe that’s perfect for all your sweet cravings. Whether you’re hosting a gathering, celebrating a special occasion, or simply treating yourself to a homemade dessert, these Cherry Bars are sure to impress.
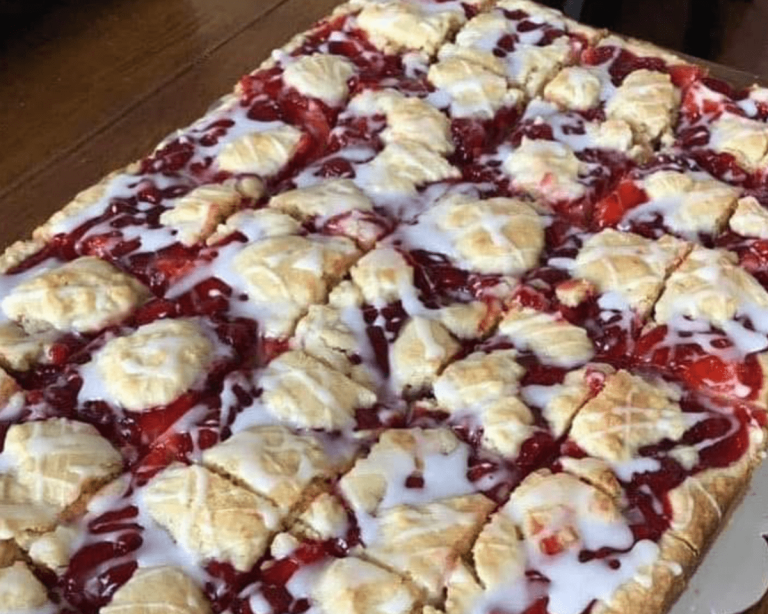
With a buttery base, a luscious cherry filling, and a drizzle of sweet glaze, these bars are a symphony of flavors and textures.
If you’re a fan of cherries, this recipe will become your go-to dessert option. And even if you’re not, I promise you’ll be converted after one bite. So, let’s dive into the world of Cherry Bars and discover how to make this delectable treat that’s perfect for any season.
Who Is This Recipe For?
This Cherry Bars recipe is for anyone who appreciates the magic that happens when buttery, crumbly dough meets the sweet and tangy goodness of cherry pie filling. It’s a recipe for those who love to bake, whether you’re a seasoned pro or a novice in the kitchen. With clear instructions and readily available ingredients, even beginners can create these bars successfully.
These bars are versatile and can be served at various occasions, from family gatherings and potlucks to picnics and bake sales. They are also excellent for satisfying that late-night dessert craving or impressing your guests at a dinner party. The best part? You can enjoy them year-round by using canned cherry pie filling, making it a convenient dessert option for any season.
Kitchen Equipment You’ll Need
Before we jump into the recipe, let’s make sure you have all the necessary equipment ready:
- Jelly Roll Pan (12×17): This large baking pan is essential for achieving the perfect thickness for your bars.
- Aluminum Foil: You’ll use this to line the pan and ensure easy removal and cleanup.
- Nonstick Spray: To prevent the bars from sticking to the foil.
- Stand Mixer: While you can mix the dough by hand, a stand mixer makes the process much easier and faster.
- Whisk: For preparing the glaze.
- Wire Rack: This will come in handy for cooling the bars after baking.
Now that we’re all set, let’s get baking!
Kitchen Tips and Recipe Variations
- Shortcut: If you’re short on time, you can use store-bought cherry pie filling instead of making it from scratch.
- Nutty Twist: Add a cup of chopped nuts, such as almonds or pecans, to the dough for an extra layer of crunch and flavor.
- Seasonal Variations: Swap out the cherry filling for other fruit pie fillings like blueberry, raspberry, or apple to suit the season or your personal preference.
- Store Leftovers: If you somehow manage to have leftovers, store them in an airtight container at room temperature for up to 3 days. For longer storage, refrigerate for up to a week or freeze for a few months.
FAQ
Q1: Can I use fresh cherries instead of canned pie filling?
A1: Absolutely! Fresh cherries can be used, but you’ll need to pit and prepare them before adding them to the bars. You may also need to adjust the sugar to taste.
Q2: Can I make these bars gluten-free?
A2: Yes, you can use a gluten-free flour blend in place of all-purpose flour. Just be sure it’s a 1:1 substitute for best results.
Q3: Can I double the recipe for a larger crowd?
A3: Yes, you can double the recipe and use a larger baking pan if needed. Just adjust the baking time accordingly.
Pairing Suggestions
These Cherry Bars are delicious on their own, but if you’re looking to elevate your dessert experience, here are some pairing suggestions:
- Vanilla Ice Cream: A scoop of vanilla ice cream pairs wonderfully with the warm Cherry Bars.
- Coffee or Tea: Enjoy a bar with a cup of your favorite coffee or a soothing herbal tea.
- Whipped Cream: For an extra dose of decadence, top your bars with a dollop of whipped cream.
Share and Subscribe
I hope you enjoy making and savoring these Cherry Bars as much as I do! If you found this recipe helpful and delicious, please consider sharing it with your friends and family. And don’t forget to subscribe to my blog for more mouthwatering recipes, kitchen tips, and culinary inspiration. Happy baking!
[tasty-recipe id=”337″]