
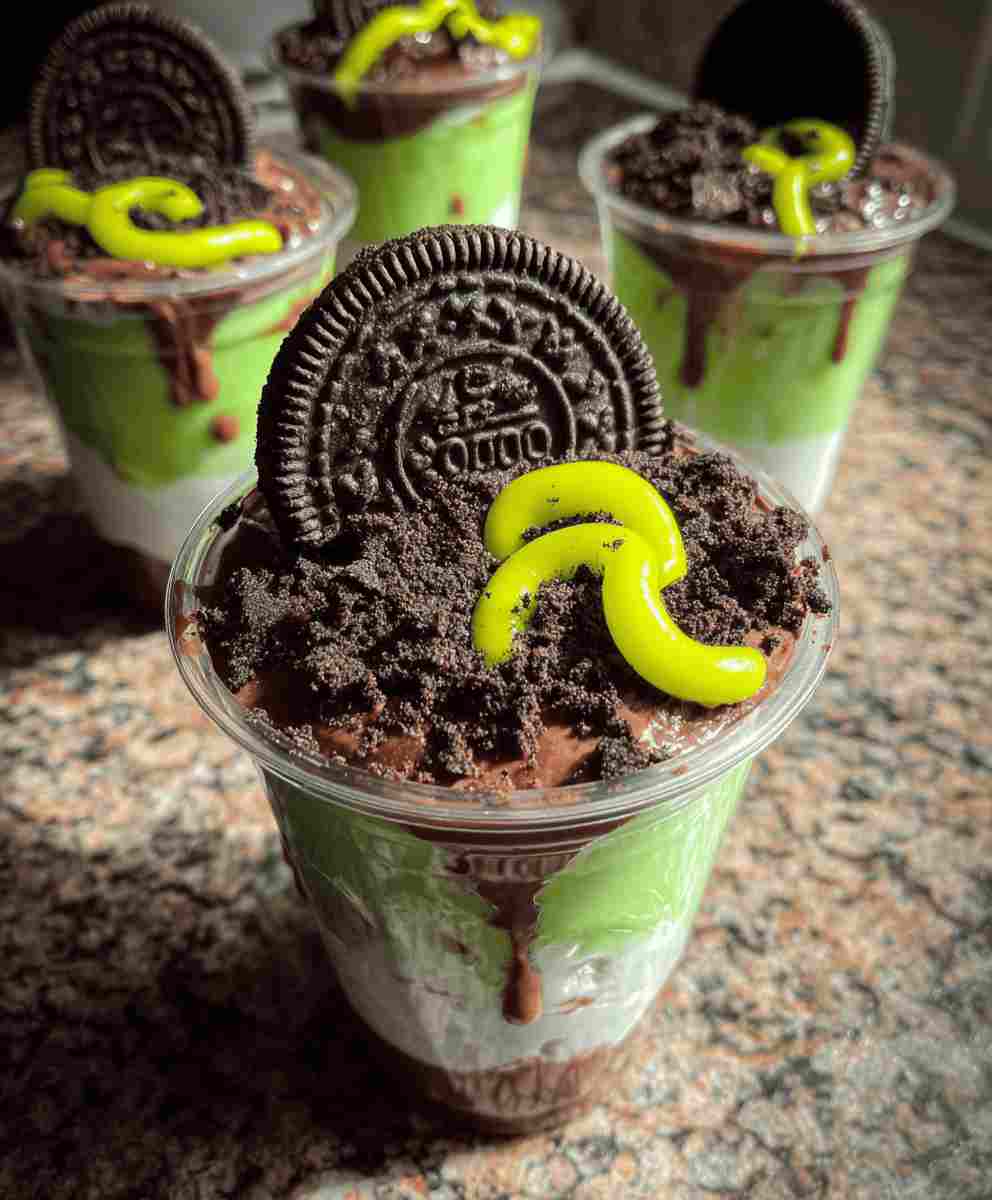
Make Halloween spooky and delicious with these Zombie Pudding Cups! Perfect for kids’ parties, classroom treats, or a fun family dessert, these pudding cups combine creamy chocolate and vanilla layers with crunchy Oreo “dirt,” topped with bright green whipped cream and wriggling gummy worms. This easy Halloween dessert is not only visually striking but also simple to assemble, making it an ideal quick weeknight recipe or party-ready treat.
With just a few ingredients and minimal prep time, these affordable, fun dessert ideas deliver maximum impact. The layers of chocolate and vanilla pudding create a creamy base, while Oreo crumbs provide a crunchy texture that mimics spooky “dirt.” Top it off with green whipped cream and gummy worms for a playful, creepy effect that both kids and adults will love.
Why You’ll Love This Recipe
- Quick & Simple: Ready in under 20 minutes with no baking required.
- Kid-Friendly: Fun, interactive dessert that children love to make and eat.
- Party-Perfect: Eye-catching layers and Halloween theme make it ideal for gatherings.
- Budget-Friendly: Uses pantry staples like pudding, Oreos, and whipped cream.
- Customizable: Easily swap flavors, colors, or toppings for a unique twist.
- No-Bake Dessert: Perfect for beginners or last-minute dessert needs.
Ingredient Breakdown
Chocolate Pudding: Provides a rich, creamy base that mimics “grave dirt.” Use store-bought instant or homemade pudding.
Vanilla Pudding: Adds a contrasting creamy layer that looks like zombie slime emerging from the ground.
Crushed Oreo Cookies: Adds crunch and visual texture, creating a dirt-like appearance that enhances the Halloween effect.
Green Whipped Cream: Brings the “zombie” theme to life. Tint regular whipped cream with green food coloring or use pre-made colored whipped topping.
Gummy Worms: The playful garnish gives these cups a creepy, fun element. Choose your favorite gummy worms or other Halloween candies.
Plastic Cups: Perfect for individual servings, easy to display, and fun for parties or trick-or-treat events.

Pro Tips
- Use Instant Pudding: Quick and convenient, perfect for last-minute parties.
- Layer Carefully: Use a spoon to gently add each layer to keep them distinct.
- Green Whipped Cream: Add a few drops of gel food coloring to whipped cream for a vivid color.
- Chill Between Layers: Optional 5-minute chill between layers can help maintain separation.
- Creative Garnishes: Try candy eyeballs, mini chocolate chips, or crushed candy corn for extra Halloween fun.
Ingredient Swaps & Variations
- Dairy-Free Option: Use almond, soy, or oat milk pudding and dairy-free whipped topping.
- Flavor Twists: Substitute chocolate pudding with pumpkin spice or caramel pudding for seasonal flavor.
- Cup Variations: Serve in mason jars or small bowls for a different presentation.
- Cookie Crust: Use crushed graham crackers or ginger snaps instead of Oreos for a twist.
- Alternative Toppings: Swap gummy worms with candy skeletons, chocolate bones, or Halloween sprinkles.
Serving Suggestions
Serve Zombie Pudding Cups alongside other Halloween treats like pumpkin cupcakes, caramel apples, or candy corn bars for a festive dessert table. They are perfect as party food, classroom snacks, or even a fun family activity. Arrange on a tray for easy display, or give as individual treats at a Halloween gathering.
Make Ahead + Storage Tips
- Prepare Ahead: Assemble the cups a few hours before the event.
- Storage: Keep refrigerated up to 3 days for best texture and flavor.
- Do Not Freeze: The pudding texture may change when frozen.
- Portion Control: Use small cups for individual servings and easier cleanup.
Cultural Notes
Zombie-themed desserts have become a popular trend in Halloween celebrations across the United States. The combination of playful decorations, creepy candies, and classic dessert elements like pudding and cookies make Zombie Pudding Cups a modern Halloween favorite. These no-bake cups combine convenience, creativity, and flavor—perfect for celebrating spooky season in style.
Frequently Asked Questions (FAQ)
Can I make these cups ahead of time?
Yes, assemble and refrigerate up to 3 hours before serving. Decorate with gummy worms just before serving for freshness.
Can I make them vegan?
Yes, use plant-based pudding and whipped topping alternatives.
Are these kid-friendly?
Absolutely! Children enjoy both making and eating these fun, layered treats.
Can I use other cookies instead of Oreos?
Yes, graham crackers or chocolate wafer cookies work well.
How long will leftovers last?
Refrigerated pudding cups will last up to 3 days in an airtight container.
Zombie Pudding Cups Halloween Treats
Ingredients
Equipment
Method
- Prepare chocolate pudding according to package instructions.
- Prepare vanilla pudding according to package instructions.
- Layer chocolate pudding at the bottom of each plastic cup.
- Add a layer of crushed Oreo cookies on top of the chocolate pudding.
- Add vanilla pudding as the next layer.
- Top with green whipped cream.
- Decorate with gummy worms hanging over the side.


